做WinForms的一般都知道,传统.NET界面有一个RichTextBox控件,这个是一个富文本控件,可以存储图片文字等内容,它有自己的文件格式RTF,在DevExpress控件组里面也有一个同等的控件,他的名字是RichEditControl,这个控件功能很强大,它可以做邮件编辑器,实现图文并茂的邮件的功能,如下所示。本文主要介绍如何一步步使用这个控件实现自己需要的功能和界面。
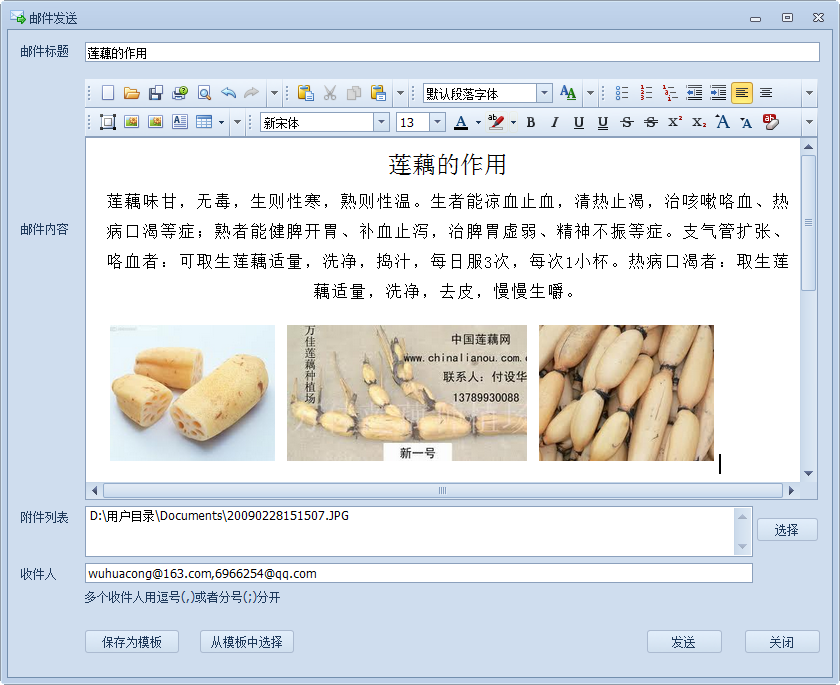
DevExpress WinForms能完美构建流畅、美观且易于使用的应用程序,无论是Office风格的界面,还是分析处理大批量的业务数据,它都能轻松胜任!
但是默认它没有任何工具栏,全部是需要自己添加上去。
如何创建带工具栏的RichEditControl控件
为了使得控件更加通用,我做了一个自定义控件,用来实现通用文本编辑器的功能,首先我们创建一个自定义控件,如下所示。
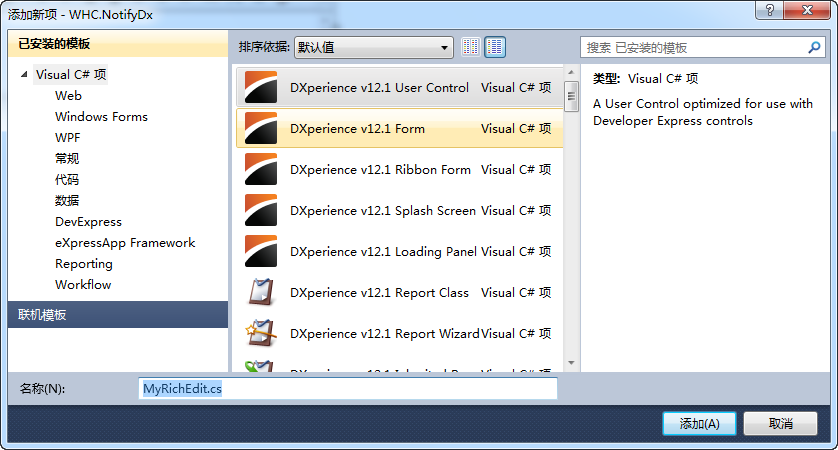
这样我们会看到一个空白的自定义控件界面,然后再往里面添加一个RichEditControl进去,设置Dock=Fill,让RichEditControl控件铺满整个自定义控件界面,如下所示。
设置器ActiveViewType=Simple,让控件显示的更紧凑一些。如下所示。
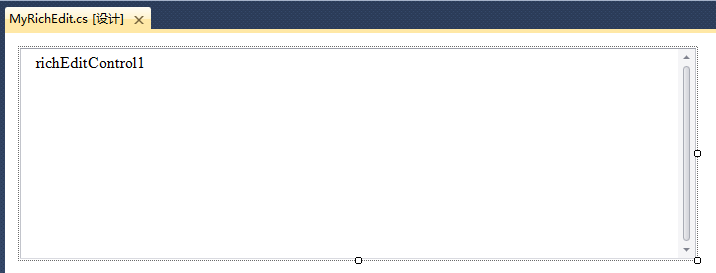
从上面我们看到,它默认是没有任何工具栏的,比较简单,那么我们要添加向上面邮件界面的功能,如何实现呢?很简单,选中RichEditControl,然后再右上角的三角符号上,单击可以看到有一些功能菜单,如下所示。
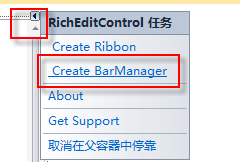
单击Create BarManager然后可以进一步看到更多的工具栏菜单了,如下所示。你可以悬着Create All Bar来创建所有工具栏,然后删除多余的就可以了。
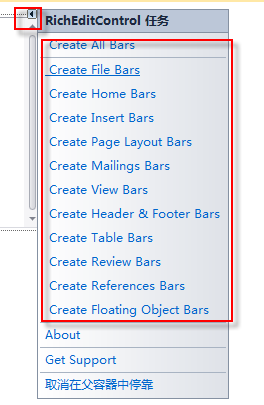
这样就可以把所有的工具栏全部列出来了,很多很多。

但是一般我们不需要那么多,精简一些重要的功能即可,这些多余的最好删除,否则很凌乱。
这些功能按钮默认都已经带有事件的处理,就是不需要额外的代码就可以实现各种标准的功能了,这些很方便,类似DevExpress这方面做得很好,如打印预览控件也是一样,基本上不需要编写代码了,选择需要的功能,多余的删除即可,这样就可以精简到我本文开头的那个邮件编辑器界面了。

如何实现自定义的按钮功能
刚才说到,里面的按钮可以随意删除,也可以随意组合到一个工具栏里面,当然,这个控件的工具栏除了内置的按钮外,还可以增加自己的按钮和事件相应,这样就更加完美和强大了。
如上面的按钮,就是我用来截图的一个功能,自定义的,内置的没有这样的功能,这样添加按钮及图片后,实现按钮的事件就可以了,和自己创建的按钮一样。
这个截图的功能,利用了我的共用类库里面的一个截图类,实现代码如下所示。
ScreenCaptureWindow captureWindow = null;
private void barCapture_ItemClick(object sender, DevExpress.XtraBars.ItemClickEventArgs e)
{
if (this.ParentForm.Owner != null)
{
this.ParentForm.Owner.Hide();
}
this.ParentForm.Hide();
if (captureWindow != null)
{
captureWindow.BitmapCropped -= new EventHandler(captureWindow_BitmapCropped);
captureWindow.Dispose();
captureWindow = null;
}
if (captureWindow == null)
{
captureWindow = new ScreenCaptureWindow();
captureWindow.BitmapCropped += new EventHandler(captureWindow_BitmapCropped);
}

captureWindow.Show();
captureWindow.TopMost = true;
captureWindow.TopMost = false;
}
void captureWindow_BitmapCropped(object sender, EventArgs e)
{
try
{
if (captureWindow.DragStop != captureWindow.DragStart)
{
RichEditControl control = this.richEditControl1;
control.Document.InsertImage(control.Document.CaretPosition, DocumentImageSource.FromImage(captureWindow.BitmapCache));
}
}
finally
{
if (this.ParentForm.Owner != null)
{
this.ParentForm.Owner.Show();
}
this.ParentForm.Show();
}
}
这个截图,直接就是把Image插入到RichEditControl里面,不需要另外存储图片到文件里的,这就是RichEditControl控件方便之处,如果我们要实现插入图片和加载文档的方法,除了使用内置按钮(推荐)外,其实自己也可以写事件来实现的,如下代码就是实现这两个简单的功能(一般不需要)。
private void barInsertImg_ItemClick(object sender, DevExpress.XtraBars.ItemClickEventArgs e)
{
string selectImage = FileDialogHelper.OpenImage(true, "");
if (!string.IsNullOrEmpty(selectImage))
{
foreach (string file in selectImage.Split(new char[] { ',', ';', ',', ';' }))
{
if (File.Exists(file))
{
try
{
RichEditControl control = this.richEditControl1;
control.Document.InsertImage(control.Document.CaretPosition, DocumentImageSource.FromFile(file));
}
catch
{
}
}
}
}
}

private void barLoadFile_ItemClick(object sender, DevExpress.XtraBars.ItemClickEventArgs e)
{
string filter = "Word2003(*.doc)|*.doc|Word2007(*.docx)|*.docx|RTF(*.rtf)|*.rtf|HTM(*.htm)|*.htm|HTML(*.html)|*.html|All File(*.*)|*.*";
string file = FileDialogHelper.Open("打开文件", filter);
if (!string.IsNullOrEmpty(file))
{
//string htmlContent = File.ReadAllText(file, Encoding.Default);
//this.richEditControl1.HtmlText = htmlContent;
string path = Path.GetFullPath(file);
string extension = Path.GetExtension(file);
switch (extension.ToLower())
{
case ".htm":
case ".html":
this.richEditControl1.Document.LoadDocument(file, DocumentFormat.Html, path);
break;
case ".doc":
this.richEditControl1.Document.LoadDocument(file, DocumentFormat.Doc, path);
break;
case ".docx":
this.richEditControl1.Document.LoadDocument(file, DocumentFormat.OpenXml, path);
break;
case ".rtf":
this.richEditControl1.Document.LoadDocument(file, DocumentFormat.Rtf, path);
break;
default:
this.richEditControl1.Document.LoadDocument(file, DocumentFormat.PlainText, path);
break;
}

//DocumentRange range = richEditControl1.Document.Range;
//CharacterProperties cp = this.richEditControl1.Document.BeginUpdateCharacters(range);
//cp.FontName = "新宋体";
//cp.FontSize = 12;
//this.richEditControl1.Document.EndUpdateCharacters(cp);
}
}
RichEditControl的特殊操作
1. 文档字体修正
RichEditControl控件功能是强大,不过一般也需要处理一些特殊的情况,由于该控件加载的时候,默认好像字体都是方正姚体的字体,因此感觉很不好看,那么我们就要在文档加载的时候,把它的字体修改下,操作如下所示,修改为新宋体的字体比方正姚体的好看很多。
public MyRichEdit()
{
InitializeComponent();

this.richEditControl1.DocumentLoaded += new EventHandler(richEditControl1_DocumentLoaded);
}

void richEditControl1_DocumentLoaded(object sender, EventArgs e)
{
DocumentRange range = richEditControl1.Document.Range;
CharacterProperties cp = this.richEditControl1.Document.BeginUpdateCharacters(range);
cp.FontName = "新宋体";
//cp.FontSize = 12;
this.richEditControl1.Document.EndUpdateCharacters(cp);
}
2. RichEditControl内置图片资源的解析
RichEditControl控件支持把图片作为内嵌资源存储在里面,如果我们要把他作为邮件发送,我们知道,邮件内容虽然是HTML的,但是图片资源需要独立取出来放到LinkedResource对象作为邮件发送才能显示,否则不能显示图片的。而RichEditControl默认转换出来的HTML内容,是把图片作为Base64码写到文档里面,文档比较大的。为了实现把图片独立提取出来,我们需要一个该控件的解析类RichMailExporter,代码如下所示。
/// <summary>
/// 把RichEditControl里面的内容导出为HTML和嵌入图片资源的辅助函数
/// </summary>
public class RichMailExporter : IUriProvider
{
int imageId;
readonly RichEditControl control;
List<LinkedAttachementInfo> attachments;

public RichMailExporter(RichEditControl control)
{
Guard.ArgumentNotNull(control, "control");
this.control = control;
}

/// <summary>
/// 导出内容和嵌入资源
/// </summary>
/// <param name="htmlBody">HTML内容</param>
/// <param name="attach">附件资源</param>
public virtual void Export(out string htmlBody, out List<LinkedAttachementInfo> attach)
{
this.attachments = new List<LinkedAttachementInfo>();
control.BeforeExport += OnBeforeExport;
htmlBody = control.Document.GetHtmlText(control.Document.Range, this);
control.BeforeExport -= OnBeforeExport;

attach = this.attachments;
}

void OnBeforeExport(object sender, BeforeExportEventArgs e)
{
HtmlDocumentExporterOptions options = e.Options as HtmlDocumentExporterOptions;
if (options != null)
{
options.Encoding = Encoding.UTF8;
}
}

#region IUriProvider Members

public string CreateCssUri(string rootUri, string styleText, string relativeUri)
{
return String.Empty;
}

public string CreateImageUri(string rootUri, RichEditImage image, string relativeUri)
{
string imageName = String.Format("image{0}", imageId);
imageId++;

RichEditImageFormat imageFormat = GetActualImageFormat(image.RawFormat);
Stream stream = new MemoryStream(image.GetImageBytes(imageFormat));
string mediaContentType = RichEditImage.GetContentType(imageFormat);
LinkedAttachementInfo info = new LinkedAttachementInfo(stream, mediaContentType, imageName);
attachments.Add(info);

return "cid:" + imageName;
}

private RichEditImageFormat GetActualImageFormat(RichEditImageFormat _RichEditImageFormat)
{
if (_RichEditImageFormat == RichEditImageFormat.Exif ||
_RichEditImageFormat == RichEditImageFormat.MemoryBmp)
return RichEditImageFormat.Png;
else
return _RichEditImageFormat;
}
#endregion
}


/// <summary>
/// 用来传递附件信息
/// </summary>
[Serializable]
public class LinkedAttachementInfo
{
private Stream stream;
private string mimeType;
private string contentId;

/// <summary>
/// 参数构造函数
/// </summary>
/// <param name="stream">附件流内容</param>
/// <param name="mimeType">附件类型</param>
/// <param name="contentId">内容ID</param>
public LinkedAttachementInfo(Stream stream, string mimeType, string contentId)
{
this.stream = stream;
this.mimeType = mimeType;
this.contentId = contentId;
}

/// <summary>
/// 附件流内容
/// </summary>public Stream Stream { get { return stream; } }

/// <summary>
/// 附件类型
/// </summary>public string MimeType { get { return mimeType; } }

/// <summary>
/// 内容ID
/// </summary>public string ContentId { get { return contentId; } }
}
这样我们在获取编辑控件里面的HTML的同时,也把里面的附件提取出来了,方便我们发送邮件使用,如下代码就是获取HTML内容和附件列表的,其中LinkedAttachementInfo是以Stream和相关信息存在的一个实体类。
string html = "";
List<LinkedAttachementInfo> linkList = new List<LinkedAttachementInfo>();
RichMailExporter exporter = new RichMailExporter(this.txtBody.richEditControl1);
exporter.Export(out html, out linkList);

MailInfo info = new MailInfo();
info.Subject = this.txtSubject.Text;
info.Body = html;
info.IsBodyHtml = true;
info.EmbedObjects.AddRange(linkList);//添加嵌入资源
info.ToEmail = this.txtRecipient.Text;//收件人
这样我们发送邮件的时候,写入附件数据就可以了,如下代码所示。
//嵌入资源的发送操作
AlternateView view = AlternateView.CreateAlternateViewFromString(mailInfo.Body, Encoding.UTF8, MediaTypeNames.Text.Html);
foreach (LinkedAttachementInfo link in mailInfo.EmbedObjects)
{
LinkedResource resource = new LinkedResource(link.Stream, link.MimeType);
resource.ContentId = link.ContentId;
view.LinkedResources.Add(resource);
}
mail.AlternateViews.Add(view);
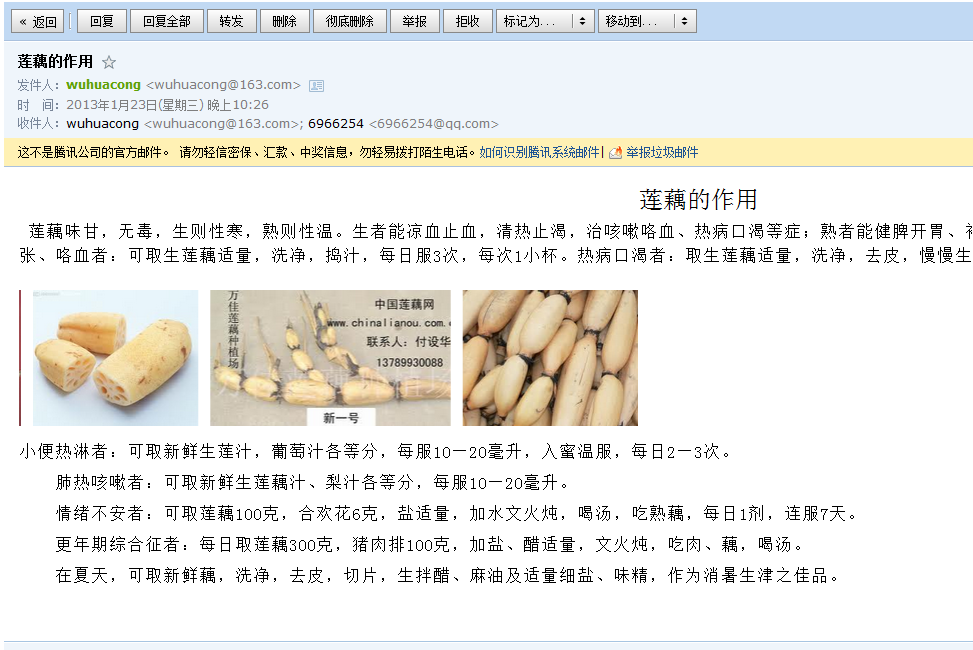
发送成功后,我们就会看到图文并茂的邮件了。
3. 内容支持搜索的操作
邮件保存的时候,我们可以把RichEditControl的内容作为RTF格式进行保存,这样图片的资源就作为代码进行保存了,这样恢复显示也很方便,唯一不好的就是这些内容不好搜索,建议如果要支持搜索,可以通过增加另外一个文本字段,把内容转换为纯文本进行保存,这样加载就以RTF内容加载,搜索的时候,就搜索纯文本就可以了。
以上就是我在使用DevExpress的RichEditControl过程中碰到和解决问题的过程,希望对大家有帮助,共同提高。
本文转载自:博客园 - 伍华聪
DevExpress技术交流群6:600715373 欢迎一起进群讨论
更多DevExpress线上公开课、中文教程资讯请上中文网获取

欢迎任何形式的转载,但请务必注明出处,尊重他人劳动成果
转载请注明:文章转载自:DevExpress控件中文网 [https://www.devexpresscn.com/]
本文地址:https://www.devexpresscn.com/post/3356.html

 联系电话:023-68661681


 返回
返回